Connecting with Kppp
Kppp can make establishing your Internet connection easy, and easy to modify. A dialer and configuration application, Kppp works with pppd, the Point-to-Point Protocol daemon.
Starting Kppp
To start Kppp, go to the Main Menu => Programs => Internet => Internet Dialer.
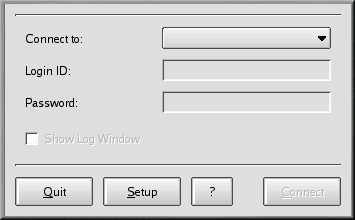
Type the password for the root account when it's requested. The opening dialog for Kppp will be "grayed out," because you haven't created an account yet (see Figure 6-15).
Configuring Kppp
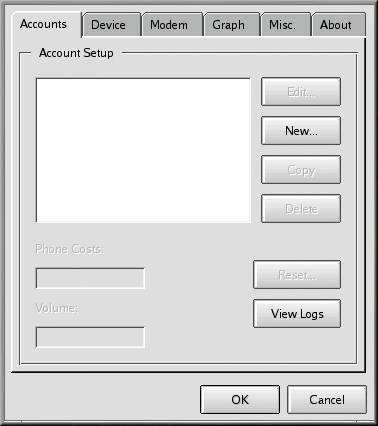
To begin, click on the Setup button. The next dialog to open will be the Kppp configuration dialog (similar to Figure 6-16).
In the New Account dialog, you can specify the account details, such as name, phone number, DNS entries, and other information. The information is divided into tabbed dialogs.
Click on the New button to enter your Internet account information.
The Dial Tab
On the Dial tab, enter the following:
-
Connection Name: The name you wish to give your account (for example, Mindspring or My ISP).
-
Phone Number: The phone number to connect to your ISP. Click on Add to enter a new number to this list.
-
Authentication: From this pulldown list, you can select a method of login authentication: PAP, Script-based, Terminal-based, or CHAP. (These are methods used to verify your login. You may want to check with your ISP to determine which type of authentication method you must use.) If you're required to use a script-based login, the section called The Login Script Tab can assist you in entering your script.
-
Store password: Check this option if you don't want to be required to enter your password each time you want to log on.
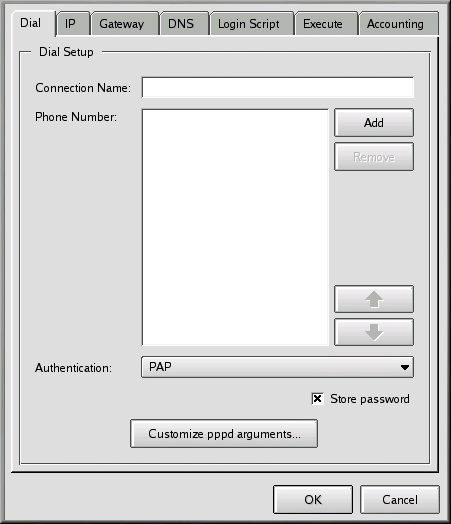
You can also customize options you want to pass to pppd in the Edit pppd arguments field, by clicking on the Customize pppd Arguments button.
Unless you know what you're doing, however, you should leave these additional options alone.
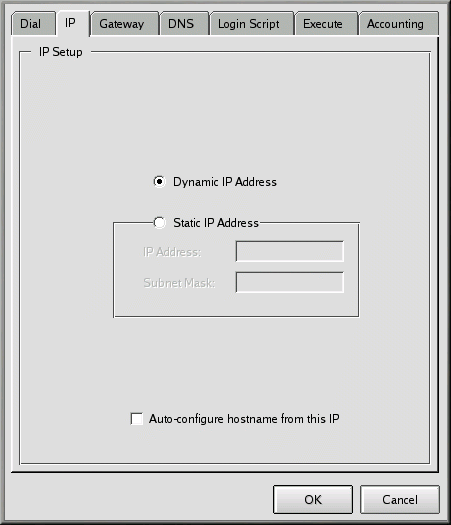
The IP Tab
On the IP tab, you should specify whether you'll be using a dynamic IP address or a static one. A static IP address is provided to you by your ISP. If you have one of these, check Static IP Address and enter the address and Subnet Mask beneath. If your ISP has not provided you with an address, check the Dynamic IP Address field (see Figure 6-18).
The Gateway Tab
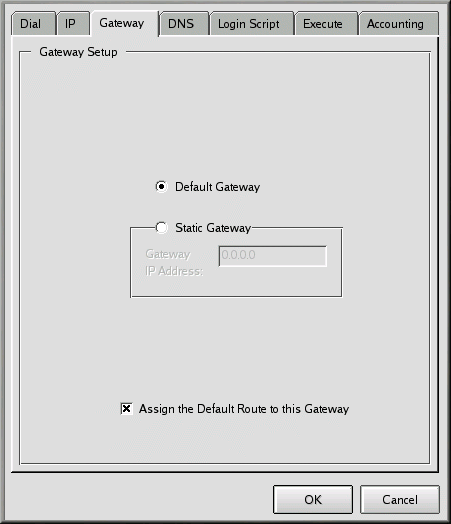
On the Gateway (see Figure 6-19) tab, select either Default Gateway or Static Gateway. If your ISP has specified an IP address you should use as a static gateway, enter that IP number in the space provided.
|
|
Assigning the Default Route |
|---|---|
|
Unless you know what you're doing, you should leave Assign the Default Route to this Gateway box checked. Unchecking this option could cause problems for your software when you're online. |
The DNS Tab
On the DNS tab (see Figure 6-20), you should enter the name of your ISP's domain name (such as earthlink.net).
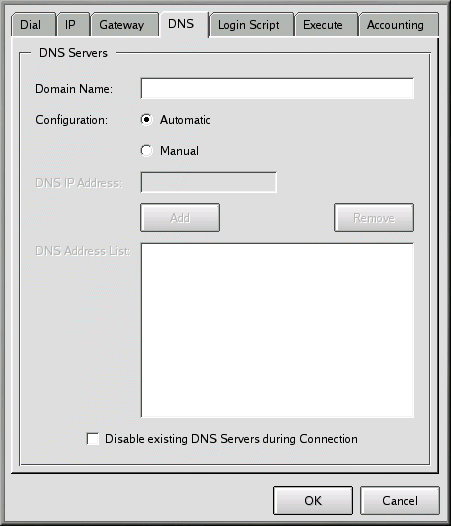
You can select the Automatic configuration option or you can select Manual and enter the DNS addresses your ISP provided you with in the DNS IP Address field. When you've finished typing in the numbers, click on Add and the numbers will be entered into the DNS Address List box. (By default, you won't be able to click on the Add button until you've entered the entire DNS number in the address field.)
Note that the field Disable existing DNS Servers during Connection will override the DNS list. If you've entered DNS numbers, you should leave this option unchecked.
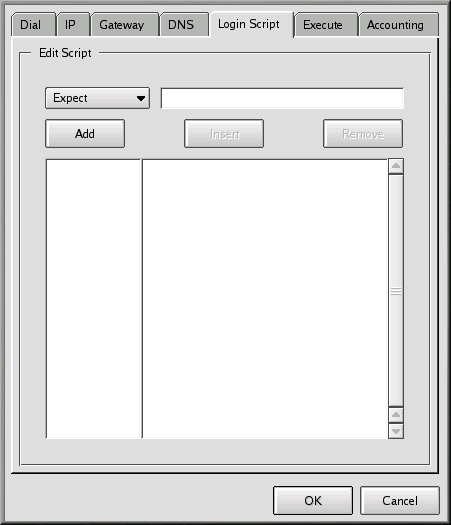
The Login Script Tab
The Login Script tab allows you to specify how you want to login to your ISP (see Figure 6-21). If you chose to use a script-based login in the Authentication procedure of the Dial tab, you can enter that script here.
Not all ISPs require a script-based login procedure; you should check with your ISP to find out specific entries which might be necessary in a login script.
A login script helps your machine negotiate a successful connection with your ISP. Your machine expects a string of information from your ISP, then sends a string of information or prompts.
On the Login Script tab, use the pulldown list at the left of the dialog to create a series of steps you want your machine to follow when you log in to your ISP. You can select a variety of options to create your script, step by step. In the field to the right of the pulldown list, type in the specific information you want to supply with the option from the pulldown list.
Click the Add button to add your step. If you must modify your script, you can choose an option, supply the information, and use the Insert button to place it in the script, rather than having to recreate the script manually.
You can also remove a step in your script by highlighting the entry and clicking the Remove button.
If you have difficulty connecting to your ISP after you configure Kppp, check the option Show Log Window on the main Kppp dialog. The log window will open when you try to connect to your ISP, showing you what your ISP is expecting and what your machine is sending.
Table 6-1 shows a sample login script for an ISP which sends a prompt for the login ID, then for the password, and finally, after a brief pause, requires that a user send the string ppp.
Table 6-1. A Sample Login Script
|
Option |
Enter |
Purpose |
|---|---|---|
|
Expect |
ID: |
Wait for the ID: login prompt from the server |
|
Send |
mylogin |
Send your login name for the account |
|
Expect |
word: |
Wait for the password prompt from the server |
|
Send |
mypassword |
Send the account's password |
|
Expect |
welcome to yourisp |
Wait for the welcome message from the server |
|
Pause |
3 |
Specifies a pause of three seconds (a value for Pause will be in seconds, by default) |
It may not be necessary for you to use a script-based login procedure; however, this depends on your ISP's requirements. In some cases, using PAP or CHAP may be all that's necessary. Again, check with your ISP for specific login requirements.
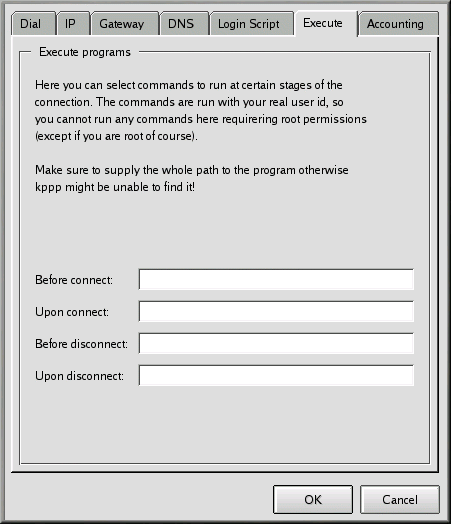
The Execute Tab
You can enter commands to run at different stages of your connection on the Execute Tab. For example, type netscape in the field next to Upon connect and Netscape will open automatically when you connect.
The Accounting Tab
On the Accounting tab, you can specify whether and how you want Kppp to monitor your online activities (see Figure 6-23).
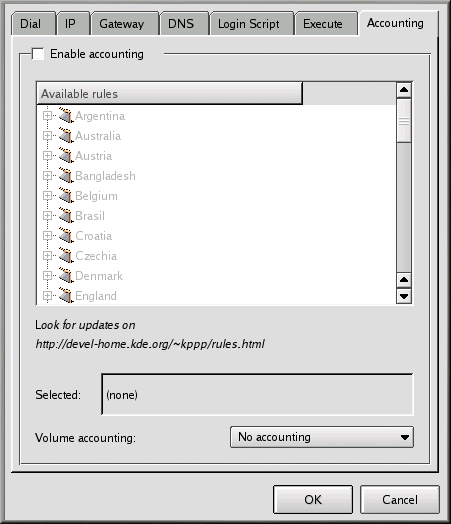
Accounting is useful if your ISP bills you by the number of bytes transferred during your time online rather than by a flat monthly rate. Referred to as volume accounting, this tool will count the number of bytes to or from your machine on the Internet.
To enable accounting, check the Enable accounting box at the top of the tab. Then select the appropriate region from the list of rules beneath. From the pulldown list next to Volume accounting, select incoming bytes, outgoing bytes, or both.
Once you're finished filling in information on all of the tabs, click on OK to create your account.
Next, in the kppp Configuration window, you'll see your newly created account. If you want to modify the account, highlight the account by clicking on it once, then selecting the Edit button to the side of the Account Setup window.
Specifying a Device
Now, it's time to provide the location and speed of your modem. Go back to the Kppp Configuration Dialog and select the Device tab (see Figure 6-24). Here, you specify where your modem is located, its baud rate, some hardware settings, and other specifics.
In the Modem Device field, you'll find a pulldown menu from which you can choose the location of your modem.
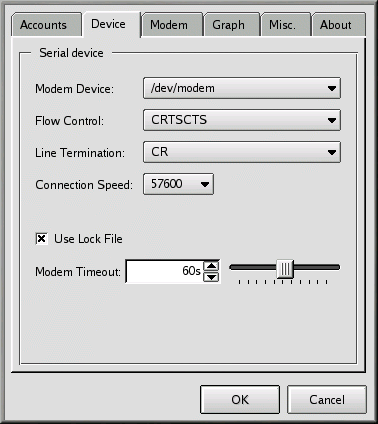
The following list is a comparison of serial port names in MS-DOS (and Windows) and Linux. If you know that your modem is attached to COM2 under Windows, for example, its location in Linux will be /dev/ttyS1.
-
COM1 = /dev/ttyS0
-
COM2 = /dev/ttyS1
-
COM3 = /dev/ttyS2
-
COM4 = /dev/ttyS3
Once you've selected the location of your modem, you can select the flow control.
Although you have a choice in the pulldown list for Flow Control, the default, CRTSCTS, which specifies hardware flow control, is the recommended setting (XON/XOFF specifies software flow control).
The following field, Line Termination, allows you to specify a correct setting for your modem. Often, the CR/LF entry is correct for most modems. If, however, you have difficulty querying your modem (see the section called Testing Your Modem), this may be one area to which you should return to adjust settings.
In the Connection Speed field, you can select the highest baud rate for your modem (for example, a 56k modem can typically be set to 115200).
By default, Use Lock File is checked. This means that Kppp will lock the device while you're online, preventing others from using the modem.
Your entry in the Modem Timeout field establishes the time, in seconds, during which Kppp waits for a CONNECT response after dialing.
Testing Your Modem
From the Modem tab, you can test your modem's configuration (see Figure 6-25). By adjusting the slider next to Modem volume, you can modify the volume of your modem while you're dialing and connecting.
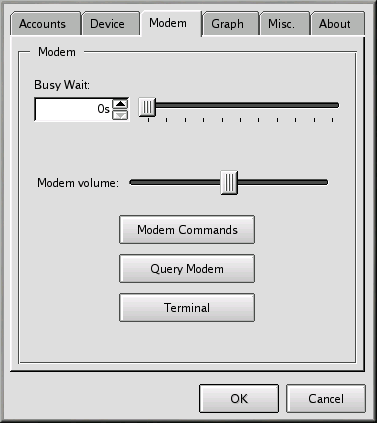
When you select the Modem Commands button, you'll be presented with the Edit Modem Commands dialog, which will allow you to modify how your modem dials, connects, and more.
|
|
Check Your Modem's Documentation |
|---|---|
|
Check the documentation supplied with your modem for specifics on your modem's initialization string, dial string, and other settings. |
Click on the Query Modem button to have Kppp search your system to identify the modem. A window similar to Figure 6-26 will open to show the progress of the query.
If the query was successful, you'll see the results in the dialog which follows, showing details which Kppp has picked up from your modem.
If you click the Terminal button, Kppp will open a mini-terminal, with which you can test your modem configuration.
The Graph and Misc Tabs
The Graph tab is for the configuration of the throughput graph. When using the modem, you can view a graph of the upload and download history. This configuration section lets you change the colors of that graph.
On the Misc tab, you can set options like automatic reconnection or disconnection, display of Kppp on connection, and more.
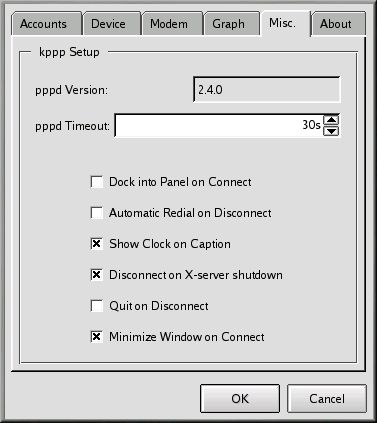
You can select from the following options:
-
pppd Timeout: Specifies the time allowed to establish a connection before giving up.
-
Dock into Panel on Connect: Select this to have Kppp displayed as an icon in the panel once you establish a connection. (This option overrides the Minimize Window on Connect selection.)
-
Automatic Redial on Disconnect: Select if you want to have Kppp immediately redial your service if you're disconnected.
-
Show Clock on Caption: Select this to see a clock displaying your connection time.
-
Disconnect on X-server shutdown: If you choose this option, your connection will be terminated when your X server shuts down.
-
Quit on Disconnect: When you've disconnected from your ISP, Kppp will also quit. Otherwise, you'll return to the initial Kppp window.
-
Minimize Window on Connect: This will automatically minimize Kppp to the taskbar on connection.
On the Graph tab, you can modify the colors of the throughput graph, which is a visual chart showing you the bytes exchanged between your machine and your ISP while you're online.
The About tab displays information about Kppp, such as its authors, copyright, and credits.
Connecting and Disconnecting with Kppp
Once you've configured Kppp, you're ready to try it out.
From the Main Menu K icon, go to Internet and click on Kppp. Before the application starts, you'll be required to enter your root password.
In the main dialog for Kppp which opens, enter the login ID and password for your Internet account (as in Figure 6-28).
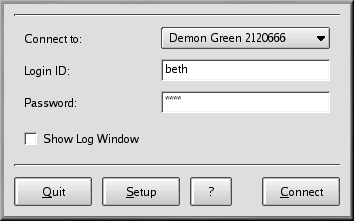
If you want to debug the configuration, or watch the progress of your connection, check the box marked Show Log Window.
To begin your online session, click on the Connect button. A window will open, showing the status of your connection, such as the initialization of your modem and the progress of the transaction. You can also open the log window by clicking on the Log button in this progress window.
Once you've established a connection with your ISP, Kppp will dock into the panel or become minimized on the Taskbar, depending on the options you selected when you configured the application.
To view statistics about your connection, such as the throughput rate and IP addresses, open the status window of Kppp and click on the Details button, which will open a window showing you statistics about your connection.
To disconnect, if the application is docked into the panel, click once on the icon to open the connection status window (see Figure 6-29). Then click on the Disconnect button.
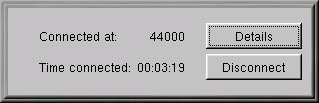
If you chose to minimize the application to the Taskbar, then maximize the application and click on the Disconnect button.